How come everything sounds like a tune name to me these days? “From GoDaddy to Cloudflare” is one for this morning should you have a tune that needs a title. It’s fresh from this mornings fun transferring a domain name from Godaddy to Cloudflare.
Seriously though, I had a slew of domain name renewal notices in my inbox this morning. This is nothing out of the ordinary for me. I have amassed quite the collection of domains over the years for one reason or another. I may have registered them for a friend I was helping, inherited them from a past project, or simply thought it was cool. Every once in a while it becomes clear that it’s time to move registrars, and today is one of those days.
There are many reasons why you might have to move a domain name from one registrar to another. Maybe you’re passing on a site to someone else, or maybe an alternate registrar offers a better price and better services. The process to transfer a domain name to another registrar has improved significantly in my opinion, costs have plummeted, and features are better than ever.
Back in the old days, a domain was $50 USD per year or more – not including SSL. It required paperwork, phone calls, and days of waiting for DNS to propagate. Today it cost me less than half of that plus it comes with SSL. I was finished before breakfast.
That being said, Cloudflare is not for everyone. If you require custom or vanity DNS servers for instance, you won’t be able to use Cloudflare.
Take a good look at your services such as email and prepare them as well. I won’t cover that here, but be sure to back things up before proceeding and double check your plan.
Triple check all this is right for your use case before proceeding.
The Conundrum
Even though the process has become much more streamlined over the years there are still quite a few steps to take. It can vary between different registrars but overall no matter where your domain is registered you need to do some things to get started. This includes making sure your contact information is up to date, unlocking the domain, and removing domain privacy during the transfer. You will get several emails during the process and both sides of the transfer need to be able to read and validate your information.
I’m going to assume you have accounts already setup at both GoDaddy and Cloudflare. At Cloudflare, I suggest you have payment information saved as well or you’ll also need to do this step later. In my case, I wasn’t billed until ownership was confirmed roughly 3/4 of the way through.
At GoDaddy
At GoDaddy, login to your account and select the domain you want to transfer. You can ignore my scribbles on the image below, but I will point out the cost to renew at GoDaddy is twice what I’ll pay at Cloudflare.

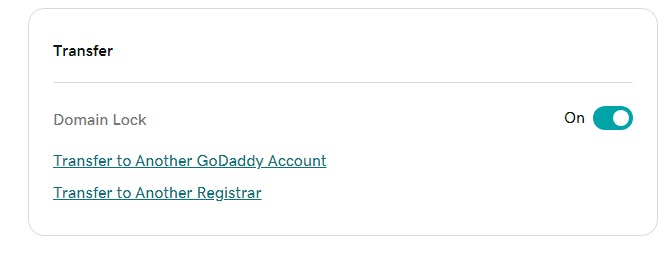
Scroll down to the bottom of this screen where there is a transfer section, and select “Transfer to another registrar.”
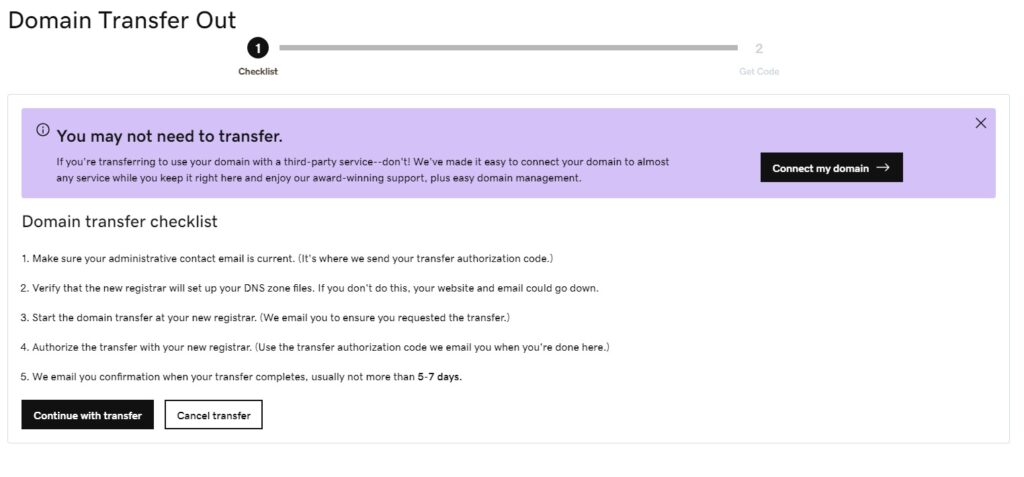
The next screen you will see presents a checklist to ensure you are ready to transfer. When you are ready, select “continue with transfer.”
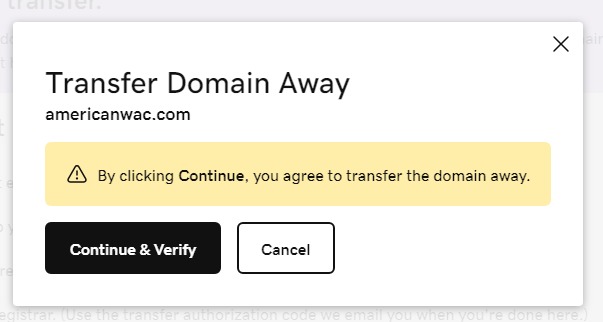
Select “continue and verify” when you are ready to proceed.
You will then be asked to verify your identity. There should be an authorization code on the page. It may be emailed to you as well, but I suggest making note of it now.
At Cloudflare
Now you can login to Cloudflare and from the home screen select “Add a site” at the top right.

On the next screen enter the domain name you are transferring and then select “continue.”
When asked to select a plan take the time to review your options. I chose the free plan, and then select “continue”.
On the following screen you will be asked to review the DNS records that it will be importing from GoDaddy. Verify this information at least matches what is at GoDaddy before proceeding. This will ensure your site will operate normally as the DNS update takes effect.
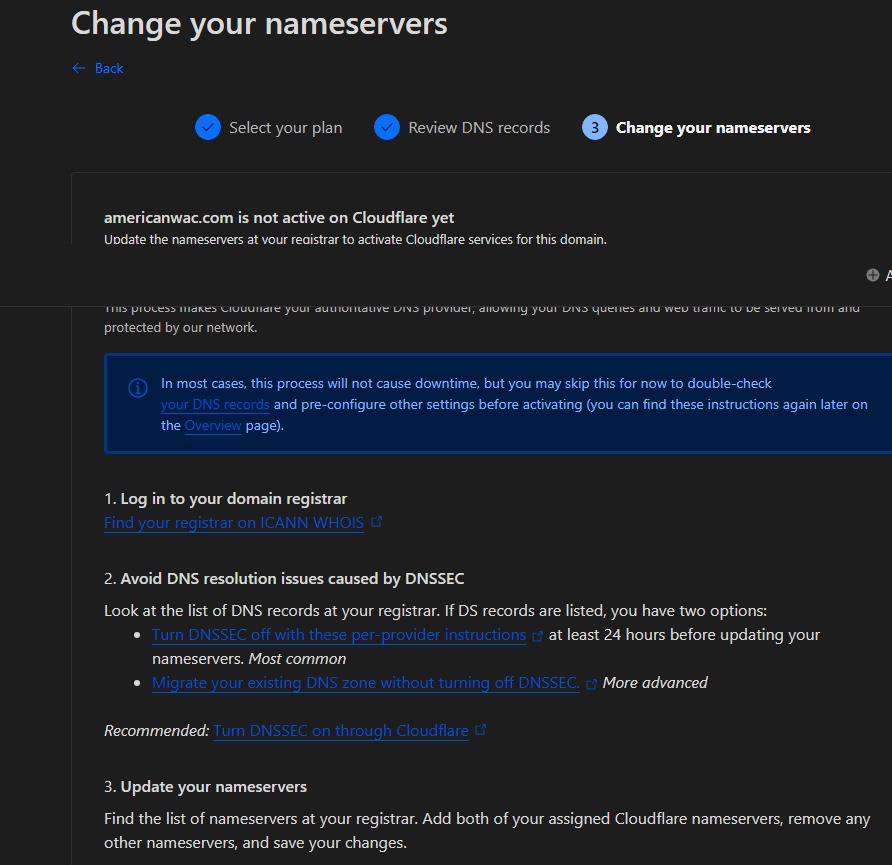
You will then be presented with nameservers to use to continue at GoDaddy.
Back at GoDaddy
With the new name servers in hand from Cloudflare, head back to GoDaddy to update the domains name servers. Select your domain, then select “DNS” followed by “nameservers” then “change nameservers.”
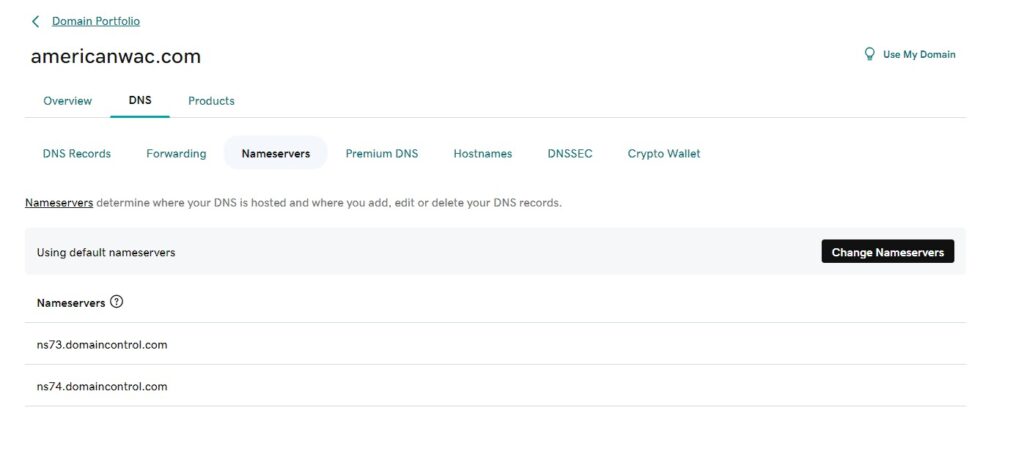
On the next screen enter the servers you were given by Cloudflare in the previous step. Note they may be different than the ones in my example. Then save and confirm.
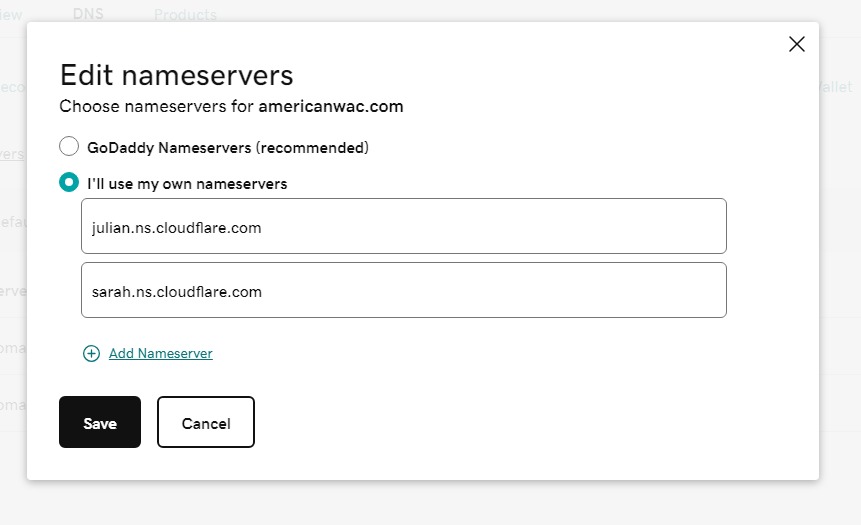
Once this is complete and you have saved the changes, head back over to Cloudflare to select some additional settings for your domain while you wait for the changes to propagate.
Return to Cloudflare
While you’re waiting for Cloudflare to detect the updated nameservers, you can take the time to configure some features unique to Cloudflare if you wish. These are specific features of Cloudflare and I suggest reading the official documentation for each to learn the best settings for your use case.
Domain settings include
- Automatic HTTPS rewrites
- Always use HTTPS (off by default)
- BROTLI compression
Now, remember the authorization code we saved from GoDaddy earlier? You need to enter that now at Cloudflare. With the domain selected, go to “Domain Registration” and “Transfer Domain” tabs. At the bottom of the screen enter the request authorization code and select “confirm and proceed” when ready.
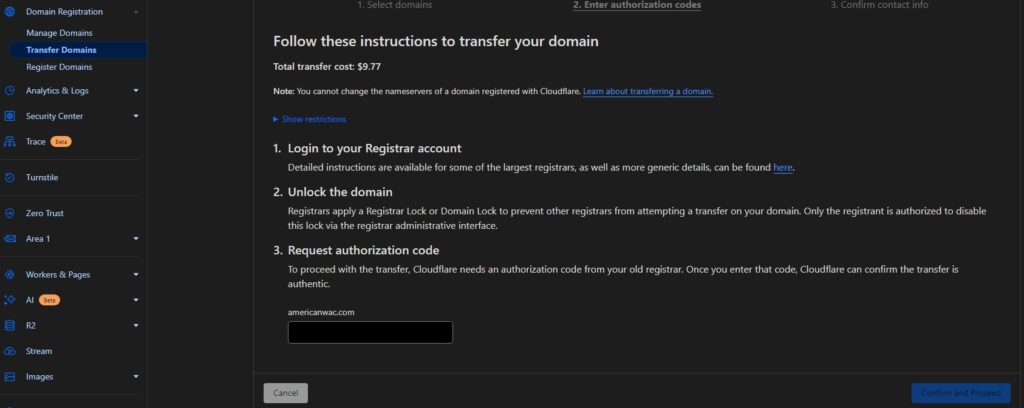
At this point Billing should take place and additional email will notify you about the status of the transfer. Your domain transfer status should now be in the pending state.
Return to Godaddy
At this point you should now be able to return to your GoDaddy account and finalize the transfer. At GoDaddy, with the domain selected, go to “transfers” and then “transfers out.”
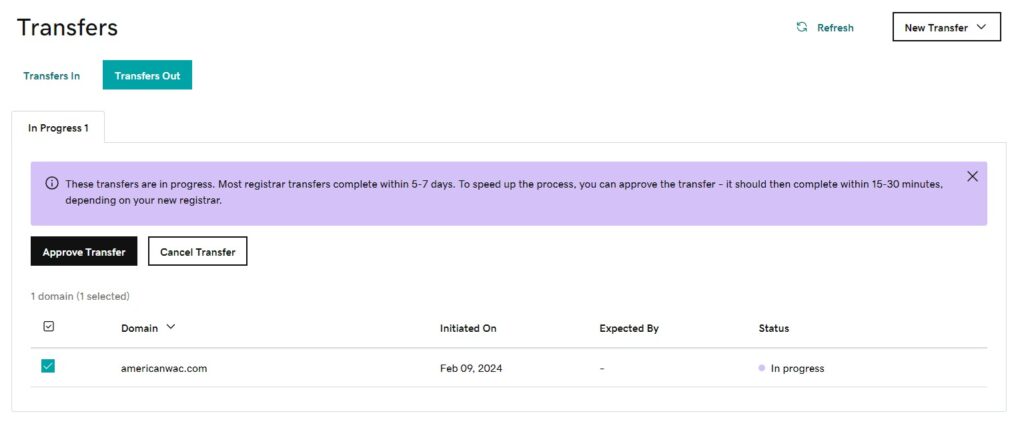
Once you click “approve transfer”, it’s almost complete. You will get some additional confirmations. Once that is successful, you can return to Cloudflare and check the status.

Time For a Rest
Congrats! I hope everything went well. It is a lot, but can you believe that the process is much more streamlined than it used to be? I suggest that you double check your site and other services such as email are still working correctly. Then, it’s time for a rest!
