Transferring a domain from GoDaddy to Cloudflare might sound like a song title—“From GoDaddy to Cloudflare” was stuck in my head this morning as I tackled the task. I had a slew of renewal notices in my inbox, which isn't unusual. Over the years, I've collected domains for various reasons: helping friends, inheriting old projects, or simply liking a name.
Sometimes, it's clear that it's time to switch registrars. Whether it's for better pricing, improved features, or handing off a site, transferring domains has become much easier. Costs have dropped, and features have improved dramatically. Back in the day, domains cost $50/year (not including SSL), and transfers involved paperwork, phone calls, and long DNS propagation delays. Today, I paid less than half that—and SSL was included. I was done before breakfast.
That said, Cloudflare isn't for everyone. If you need custom or vanity DNS servers, Cloudflare may not support that. Also, review your email setup and other services before proceeding. Back everything up and triple-check that Cloudflare fits your use case.
The Conundrum
Even though the process is more streamlined now, there are still several steps involved. While details vary by registrar, the general process includes:
- Updating your contact information
- Unlocking the domain
- Disabling domain privacy
You'll receive multiple emails during the transfer, and both registrars need to validate your information. I’ll assume you already have accounts set up at both GoDaddy and Cloudflare. At Cloudflare, it helps to have payment info saved—you’ll need it about ¾ of the way through.
At GoDaddy
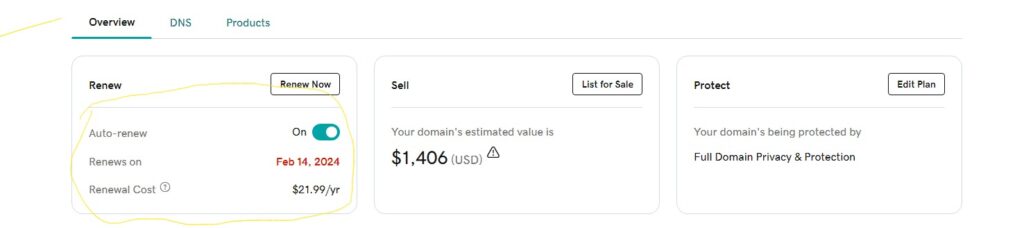
Log in to your GoDaddy account and select the domain you want to transfer. (Ignore my scribbles on the image below; note the renewal cost at GoDaddy is twice what I’ll pay at Cloudflare.)
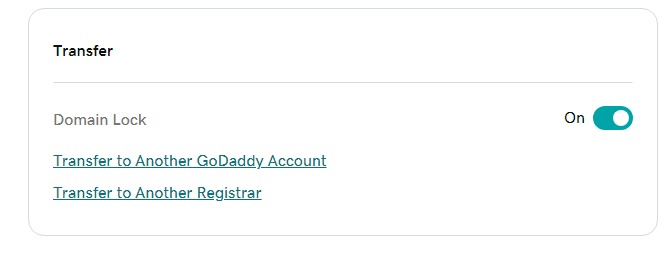
Scroll down to the transfer section and select “Transfer to another registrar.”
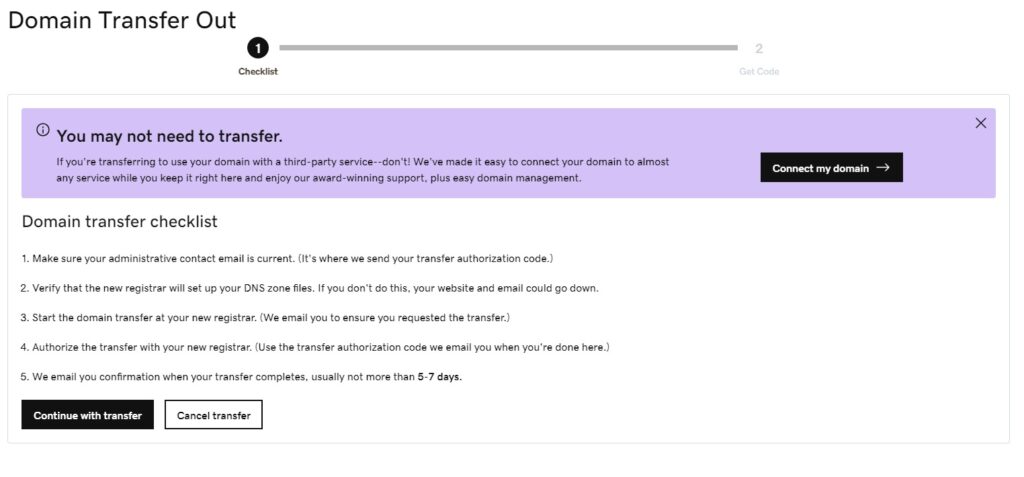
The next screen presents a checklist to ensure you’re ready. When ready, select “Continue with transfer.”
Select “Continue and verify” to proceed.
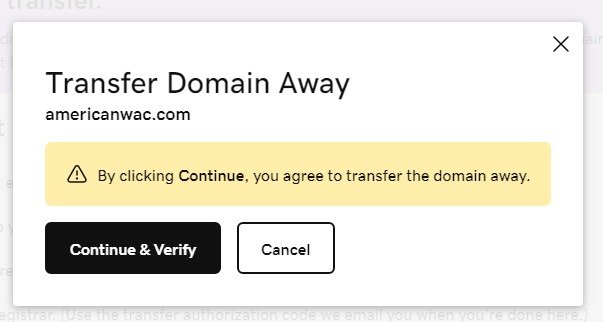
You’ll be asked to verify your identity. There should be an authorization code on the page; it may also be emailed to you, so make note of it now.
At Cloudflare
Log in to Cloudflare and select “Add a site” at the top right.

Enter the domain name you’re transferring and select “Continue.”
When asked to select a plan, review your options. I chose the free plan, then selected “Continue.”
On the next screen, review the DNS records Cloudflare will import from GoDaddy. Verify this information matches what’s at GoDaddy before proceeding to ensure your site operates normally as DNS updates take effect.
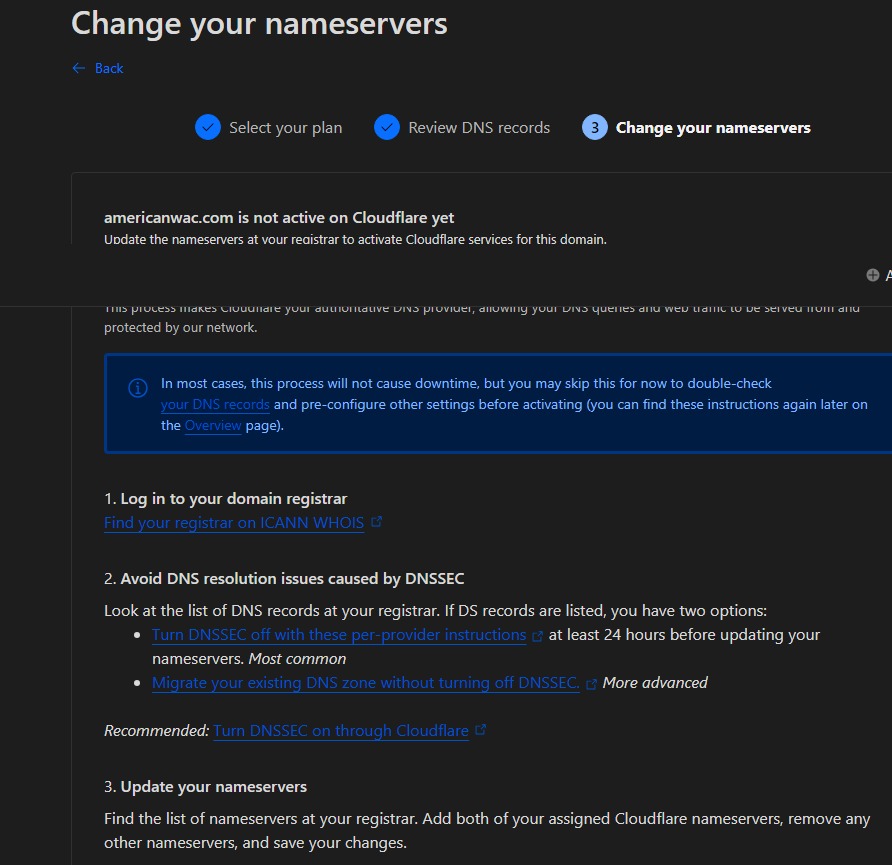
You’ll then be presented with nameservers to use at GoDaddy.
Back at GoDaddy
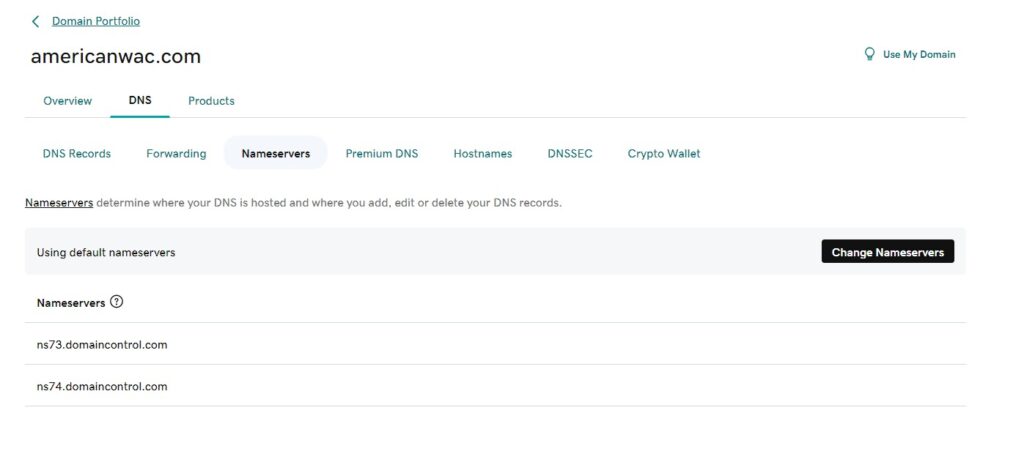
With the new nameservers from Cloudflare, return to GoDaddy to update your domain’s nameservers. Select your domain, then “DNS,” “Nameservers,” and “Change nameservers.”
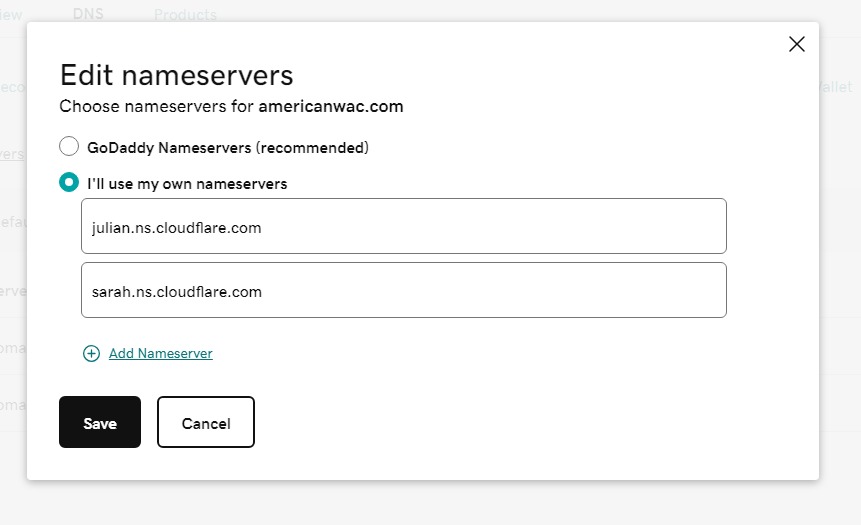
Enter the servers provided by Cloudflare. They may differ from those in my example. Save and confirm.
Once complete, return to Cloudflare to select additional settings for your domain while waiting for changes to propagate.
Return to Cloudflare
While waiting for Cloudflare to detect the updated nameservers, configure features unique to Cloudflare as needed. Review the official documentation for best practices.
Domain settings include:
- Automatic HTTPS rewrites
- Always use HTTPS (off by default)
- BROTLI compression
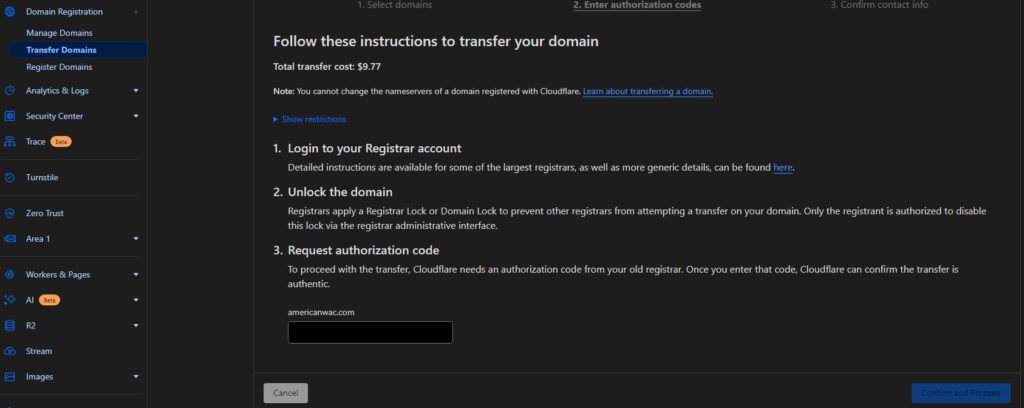
Now, enter the authorization code from GoDaddy in Cloudflare under “Domain Registration” > “Transfer Domain.” Enter the code and select “Confirm and proceed.”
Billing should occur now, and you’ll receive emails about the transfer status. Your domain transfer status should now be pending.
Return to GoDaddy
Return to your GoDaddy account to finalize the transfer. With the domain selected, go to “Transfers” and then “Transfers out.”
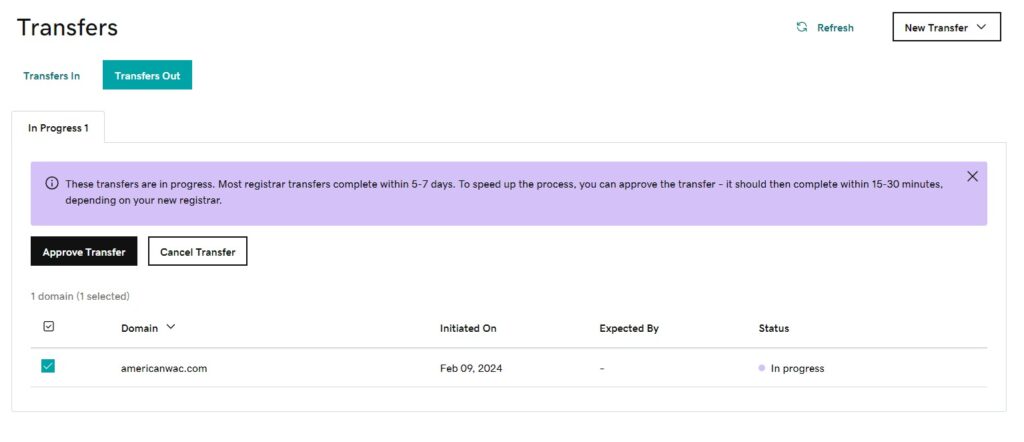
Click “Approve transfer.” You’ll get additional confirmations. Once successful, return to Cloudflare and check the status.

Time For a Rest
Congratulations! The process is much more streamlined than it used to be. Double-check your site and services such as email to ensure everything works correctly. Then, take a well-deserved rest!